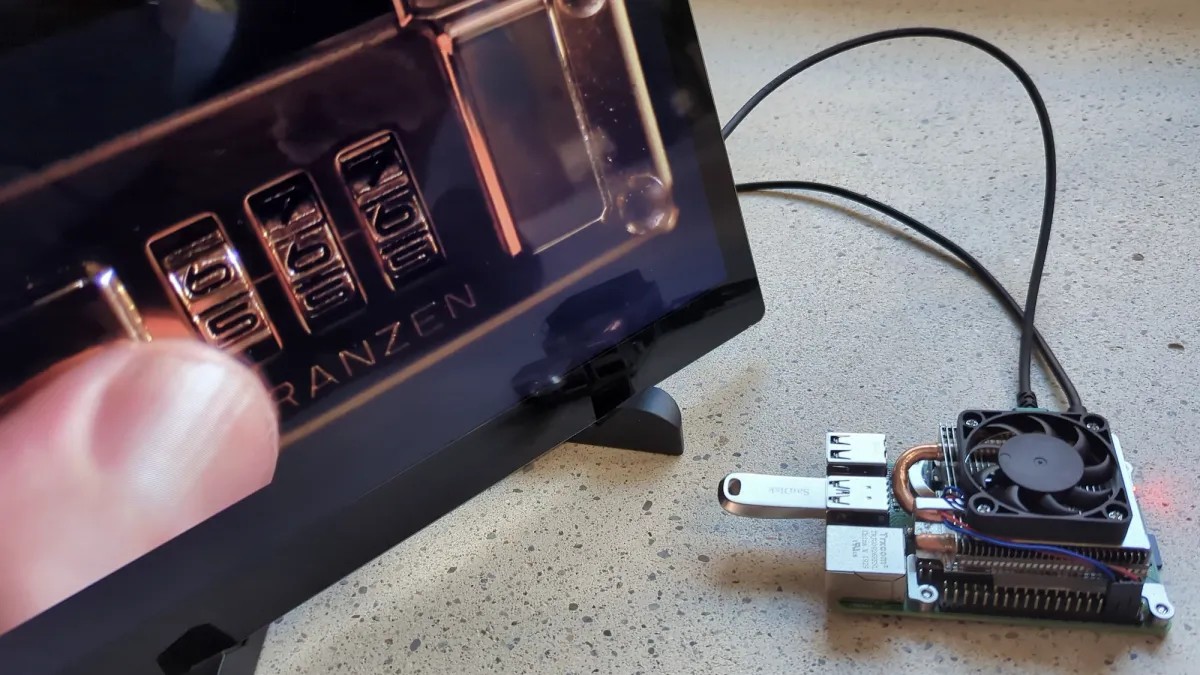
As a multimedia artist, you sometimes need a media player that can reliably loop a single video or play through a short playlist, something that just works. While museums, major exhibition venues, and established artists often rely on dedicated computers or BrightSign players, these solutions can be expensive.
But what if you're a student, running an independent off-space, or just starting out with limited budget? In that case, a Raspberry Pi is a great alternative. Depending on the model, it can loop videos in full HD or even 4K—and at the time of writing, a Raspberry Pi costs anywhere from about $10/€12.50 (Raspberry Pi Zero W, 512MB) to $80/€90 (Raspberry Pi 5, 8GB).
In this tutorial, we’ll show you how to set up any Raspberry Pi as a simple, VLC-based video looper.
CAPABILITIES
what this videolooper can do
Once you’ve completed the setup, your Raspberry Pi will automatically search for video files in a designated autoplay folder at startup, create a playlist, and loop it indefinitely. It will also scan any connected USB drives for video files and add them to the playlist. Just make sure the USB drive is plugged in before the Pi boots. The autoplay script is easy to modify, so you can adjust it to support a wide range of VLC command-line options to suit your specific needs.
1) Basic Functionality
You can either transfer video files directly to your Raspberry Pi’s internal storage or connect a USB drive via one of its USB ports. On boot, the autoplay script scans both a specific folder on the internal storage and any connected USB drives for video files. It then generates a playlist from all the found files and begins looping it automatically. This setup supports full HD playback (with stereo audio output via the 3.5mm jack by default, or through HDMI if set in the Raspberry Pi configuration via sudo raspi-config). It works with any Raspberry Pi model.
2) Seamless Looping (Special Use Case)
If you're using Raspberry Pi OS (Bookworm) with a Raspberry Pi 4 (4GB RAM tested) or Raspberry Pi 5, you’ll get exceptionally smooth, seamless looping—especially with a single video file. This works out of the box in full HD and, with a few tweaks, even in 4K resolution. That said, this tutorial is focused on a default full HD setup to ensure compatibility across all Raspberry Pi models.
3) Advanced Customization
This setup is flexible and can be customized for a variety of creative applications. You could, for example:
- Attach an external sound card for improved audio quality
- Use both HDMI ports on a Raspberry Pi 4 to play two videos on two separate displays
- Modify the autoplay script to trigger GPIO pins—e.g., to activate a stepper motor after playback
These kinds of setups require additional scripting and configuration changes, but they are absolutely possible. We may cover some of these special use cases in future tutorials.
PREREQUISITES
follow HEADLESS SETUP tutorial & additional performance tweaks
Install Raspberry Pi OS Lite
To keep things lightweight and minimal, we recommend installing a fresh version of Raspberry Pi OS Lite, a distribution without a desktop environment. This ensures better performance and faster boot times, especially for dedicated media playback setups like this one. This tutorial is compatible with both 32-bit and 64-bit versions of Raspberry Pi OS Lite, whether you're using Bookworm or Bullseye (Legacy). However, if your Raspberry Pi supports it, we suggest using the 64-bit version for improved performance. There are cases where Bullseye (Legacy) may be the better choice, particularly if you rely on specific hardware or software that hasn’t been updated for Bookworm. For example, the Pimoroni FanShim works with Bullseye but not with Bookworm at the time of writing. If you have no specific requirements, we recommend going with the latest Raspberry Pi OS Lite (Bookworm, 64-bit).
Please note: This tutorial assumes you’ve already created an admin user (with sudo privileges) and a standard user for media playback. We highly recommend completing our HEADLESS SETUP TUTORIAL before continuing, as it lays the foundation for everything that follows.
Also important: The standard user we use in this tutorial is called looper (not term7). Feel free to use a different username, but make sure you update any commands or paths accordingly.

MORE PERFORMANCE TWEAKS
In the previous tutorial, we covered how to set up ZRAM to significantly improve your Raspberry Pi's performance. In addition to that, there are a few more tweaks you can apply depending on your Raspberry Pi model.
SSH into your Raspberry Pi:
# Replace the IP Address with your own local IP Address:
ssh looper@192.168.1.123 -p 6666
Then switch to your admin account:
su adminLaunch the Raspberry Pi Software Configuration Tool:
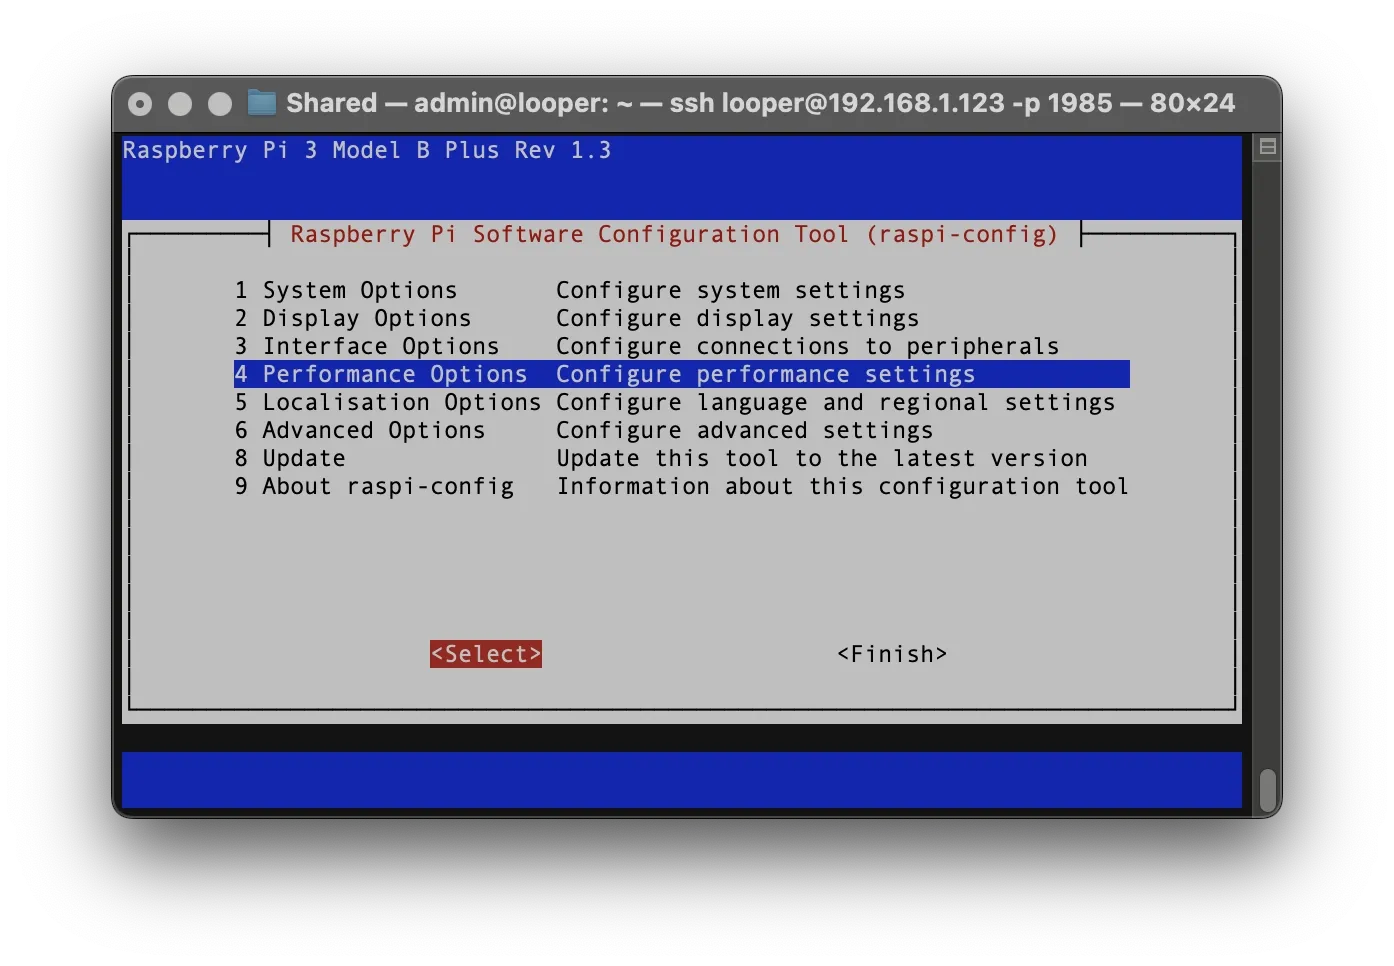
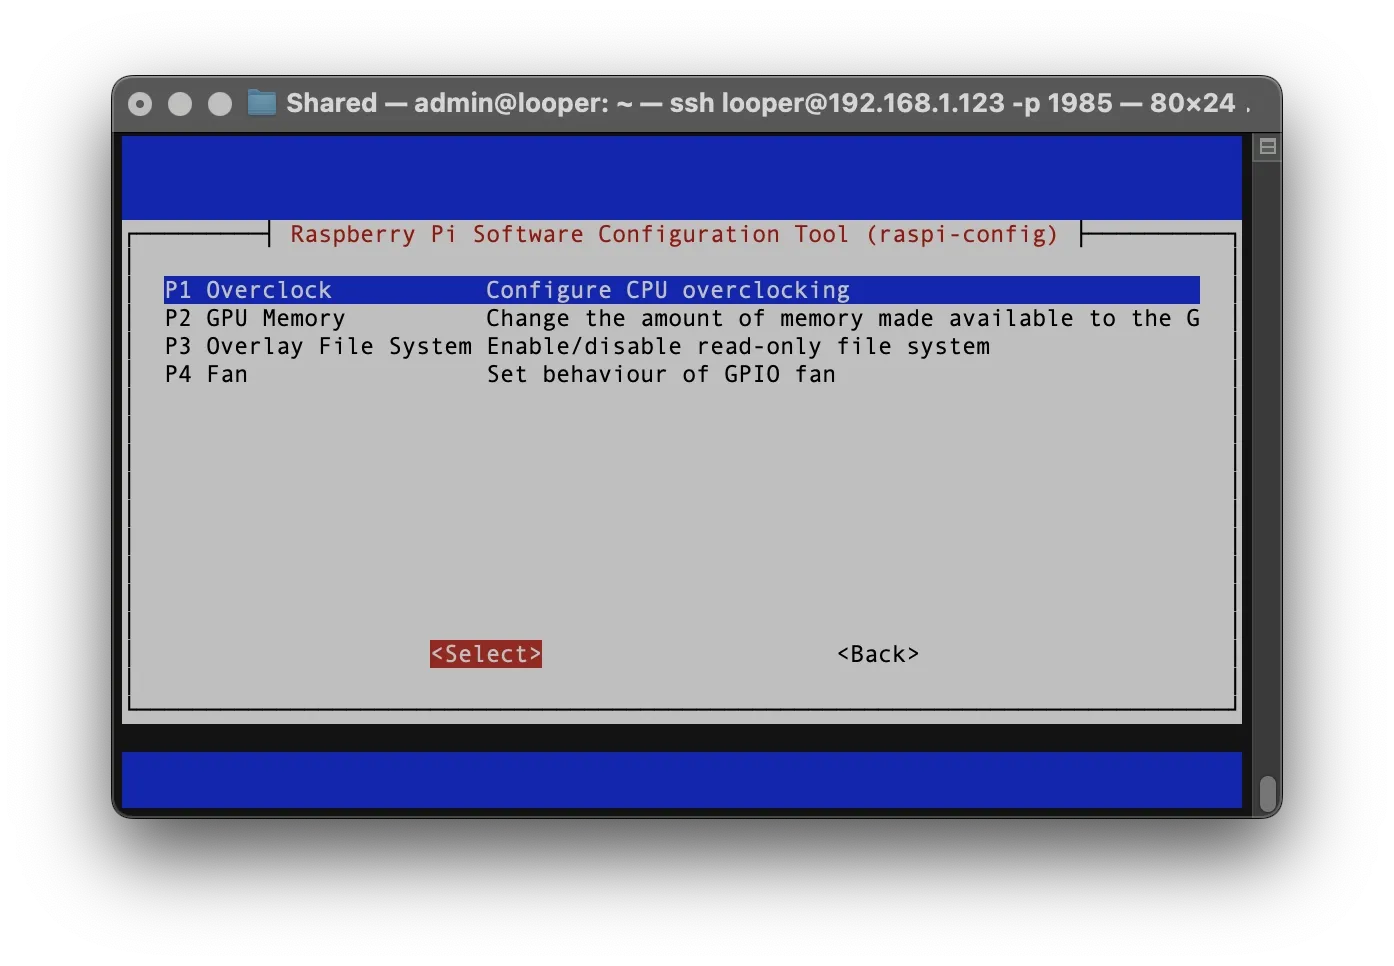
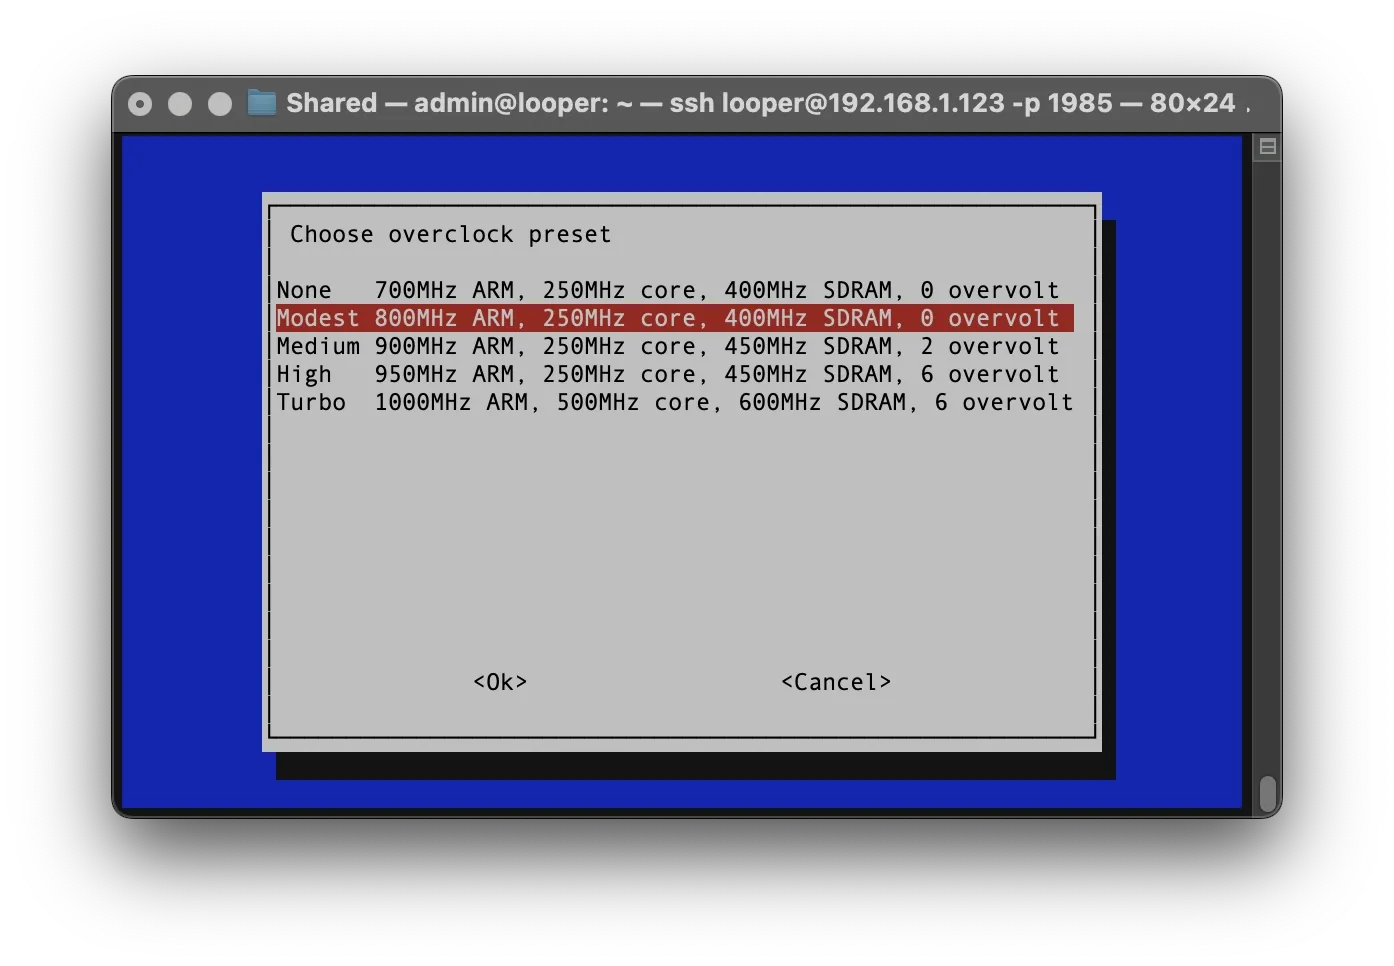
sudo raspi-configIf you're using a Raspberry Pi 2, this tool gives you the option to overclock the CPU. We recommend only applying a modest overclock that does not cause overvoltage, to keep the system stable and within safe limits.
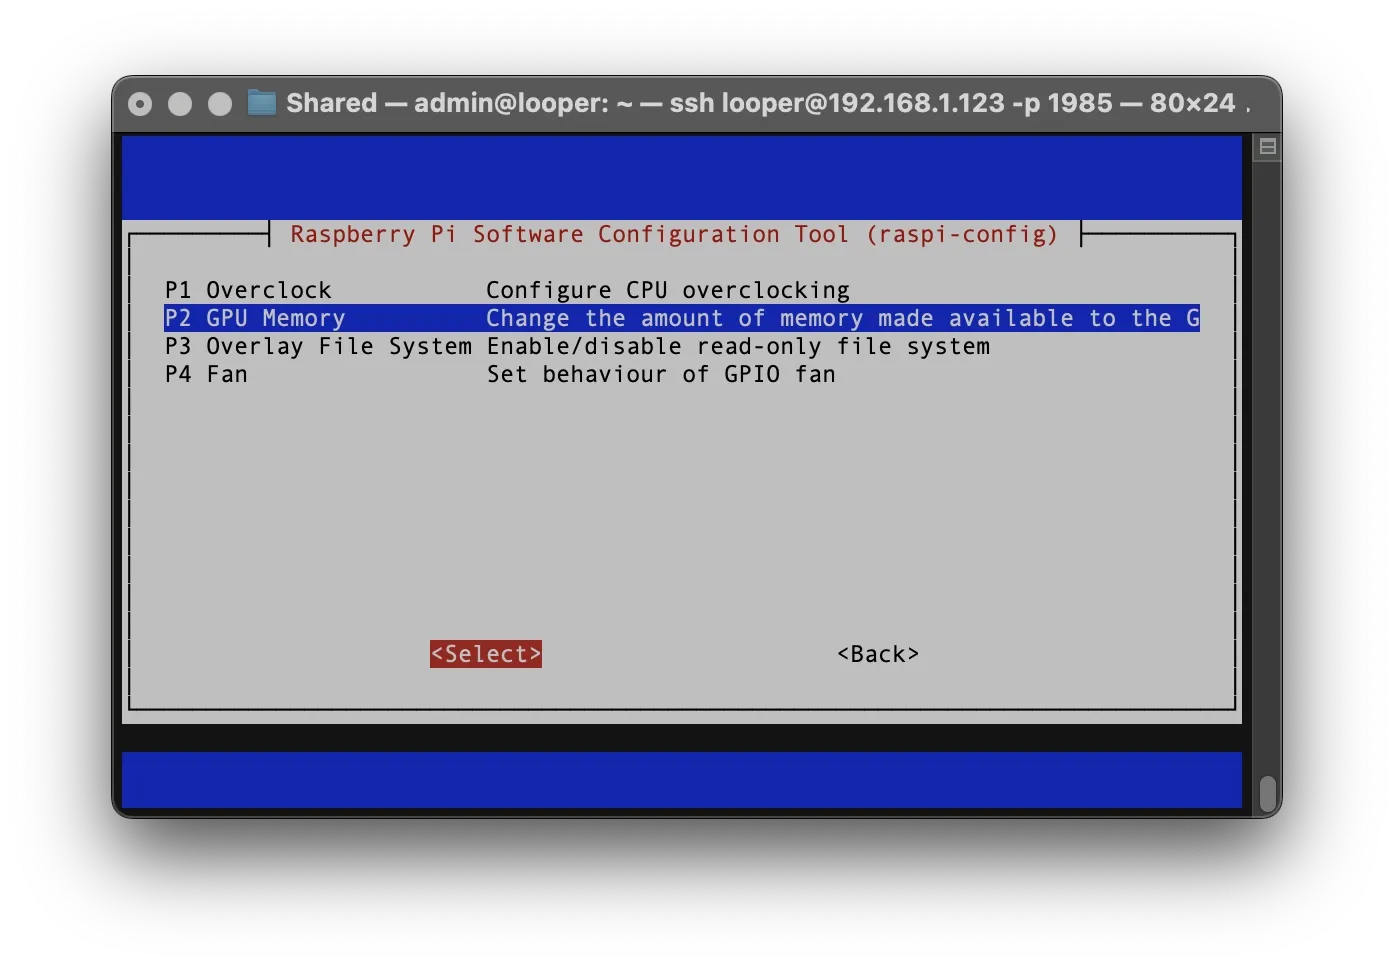
In general, we suggest adjusting the GPU memory under Performance Options. While this setting is not relevant for Raspberry Pi 4 or 5, it can help on earlier models. Depending on your total system memory, allocate 256 MB or 512 MB to the GPU for better video handling.
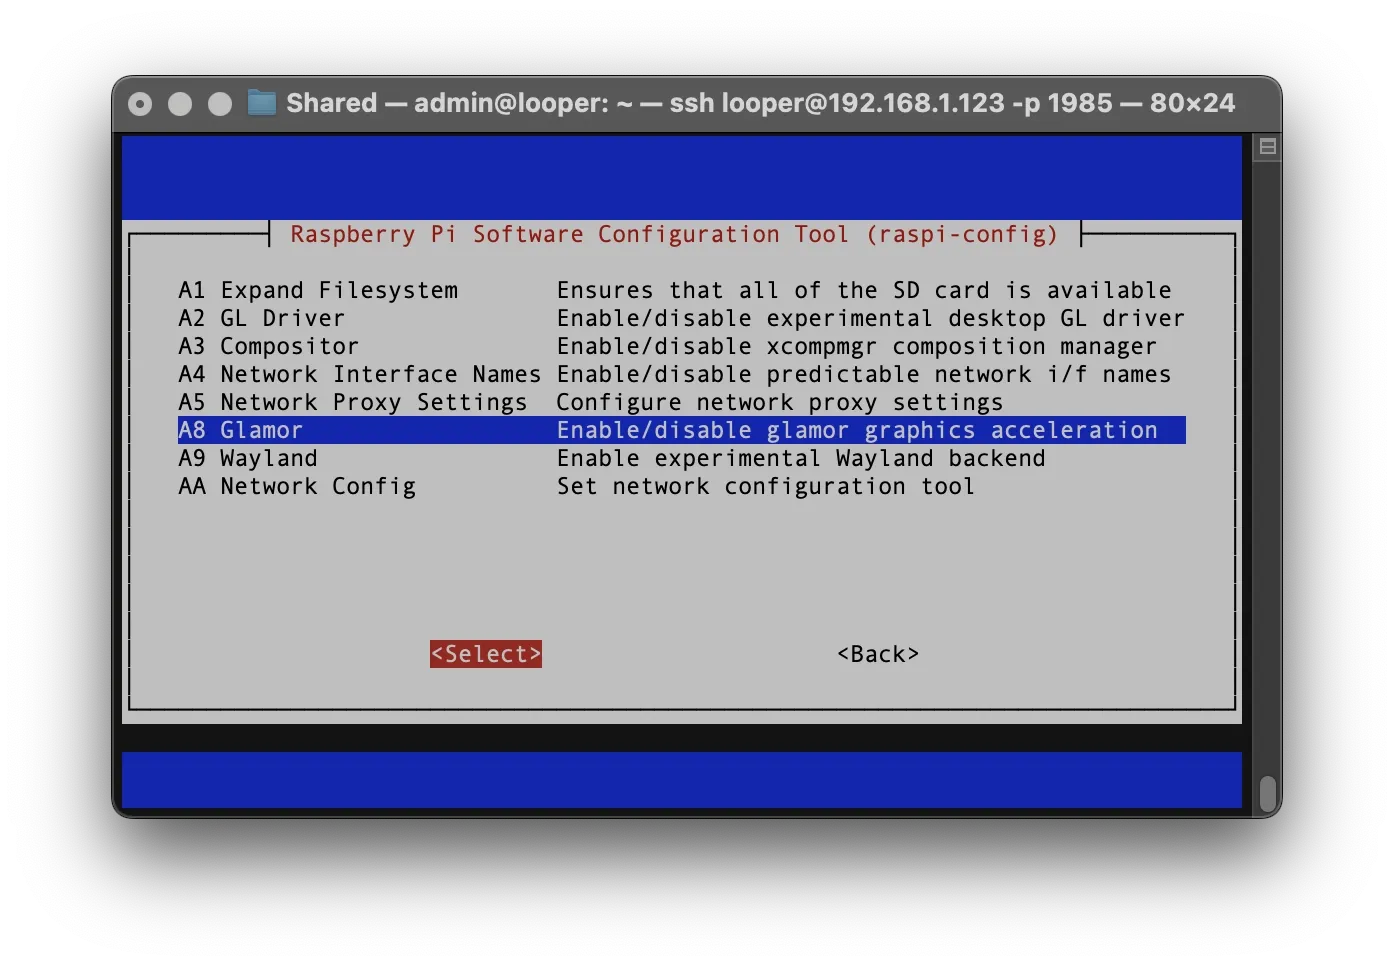
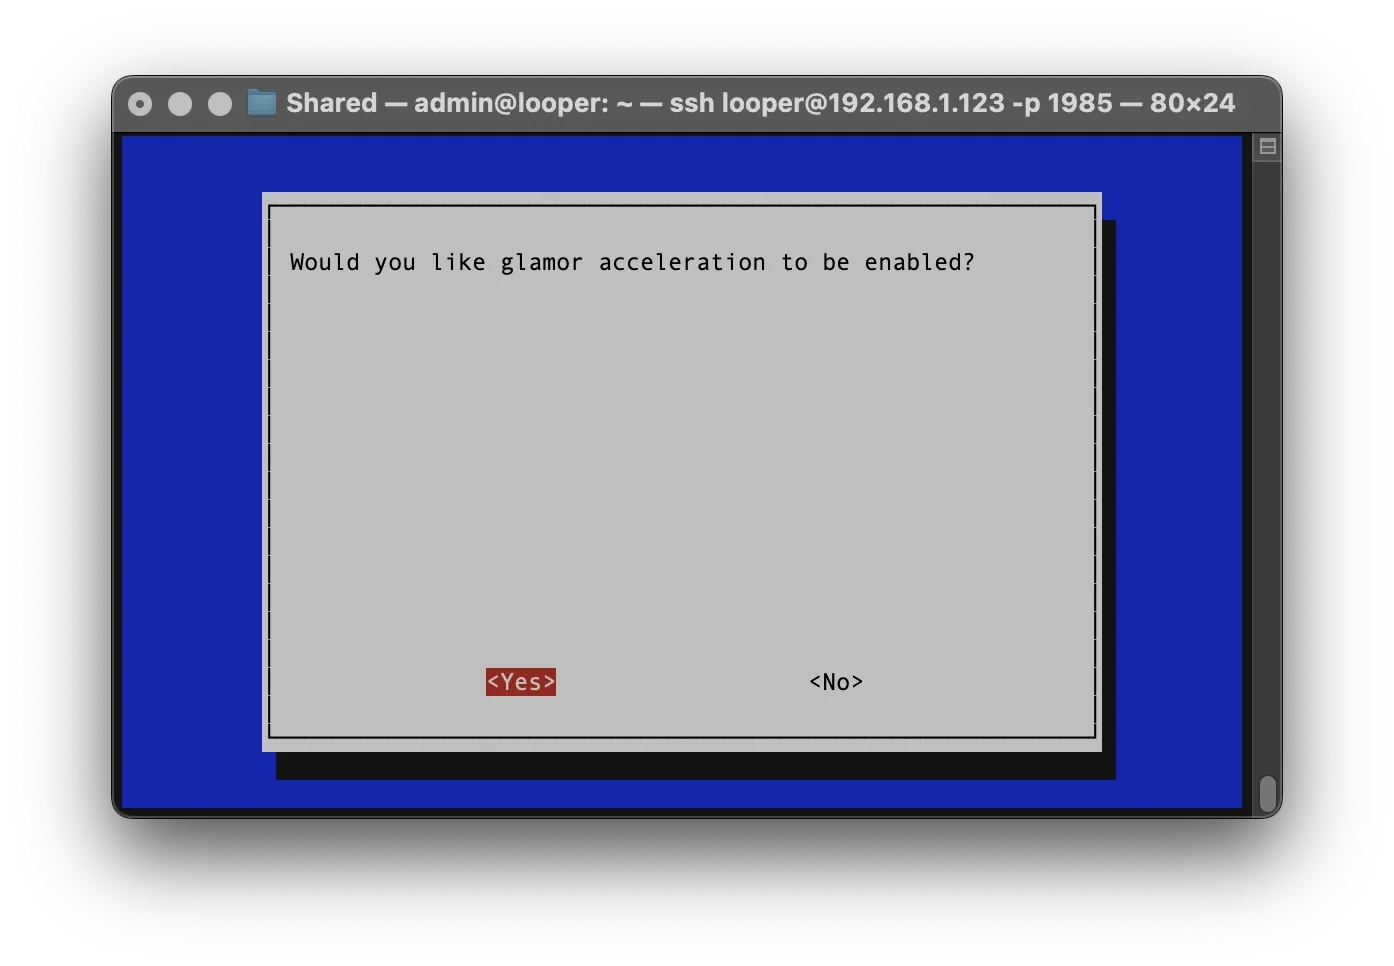
Also, make sure to enable Glamor acceleration:
Go to Advanced Options → A8 Glamor and select Enable.
This setting boosts 2D graphics performance and improves overall visual output, especially useful when using VLC for video playback.
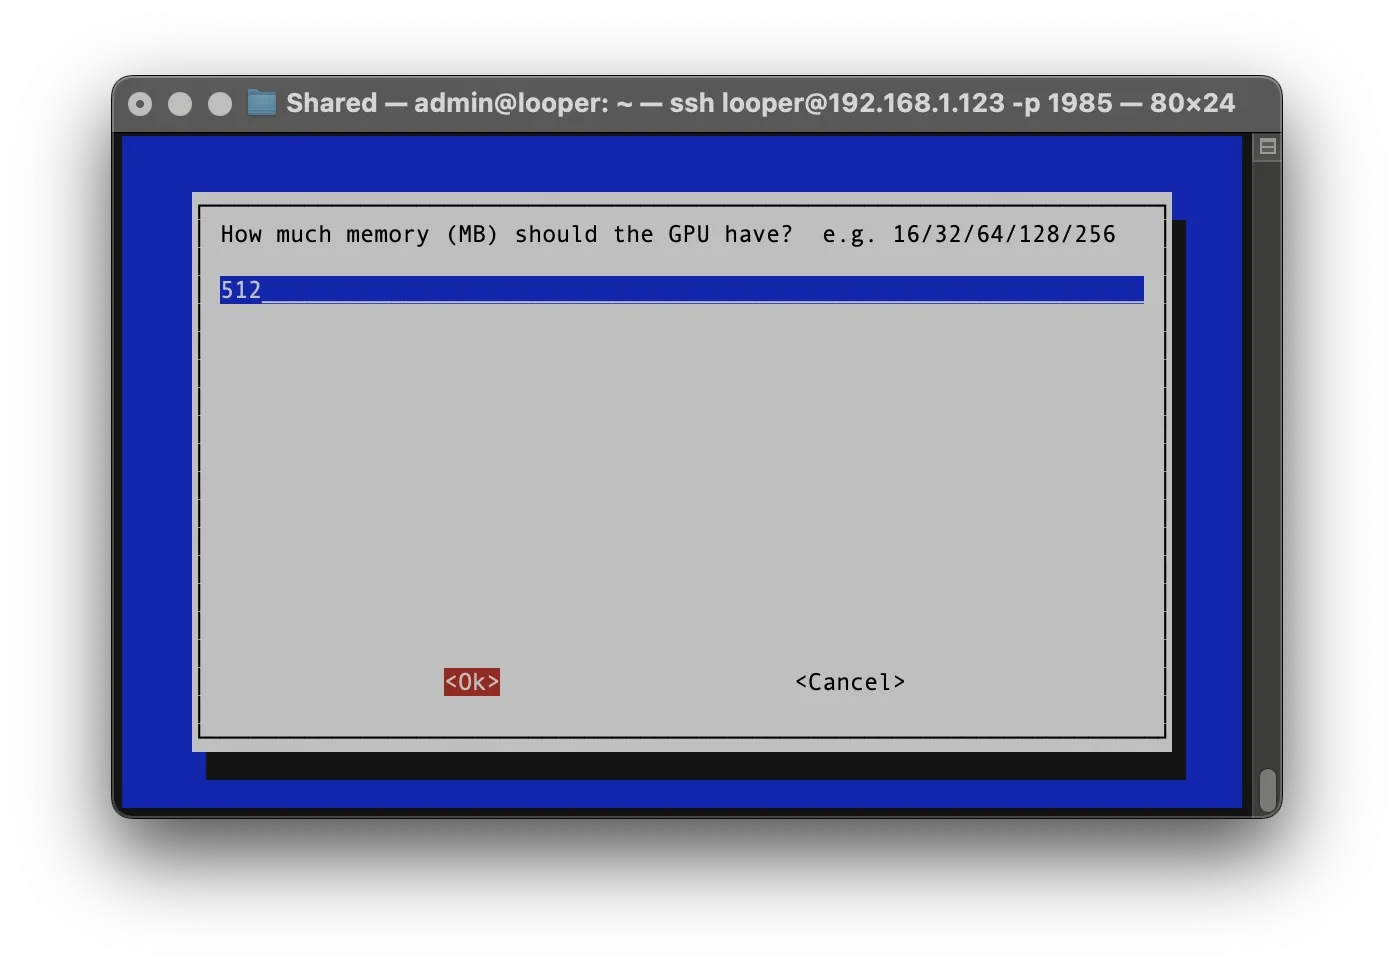
AUTOMOUNT
automatically mount USB devices
By default, Raspberry Pi OS Lite does not automatically mount USB storage devices. Since we want to autoplay video files from a USB stick, we need to enable this behavior manually.
With a combination of a udev rule, a systemd service, and a custom script, your Raspberry Pi will be able to mount USB drives at boot or when hot-plugged, and assign them to consistent, predictable mount points.
Install pmount, a tool that allows mounting removable devices as a regular user:
# Install pmount:
sudo apt install -y pmount
Create a new rule to trigger mounting when a USB drive is connected:
# Create UDEV Rule:
sudo nano /etc/udev/rules.d/usb_hook.rules
Insert the following line:
# UDEV Rule:
ACTION=="add", KERNEL=="sd[a-z][0-9]", TAG+="systemd", ENV{SYSTEMD_WANTS}="usbstick-handler@%k"
First, prepare the script location:
# Prepare Script Location :
[ -d ~/script ] || mkdir ~/script && [ -d ~/script/automount ] || mkdir ~/script/automount && cd ~/script/automount
Then create the usbmount script:
sudo nano usbmountPaste the following:
#!/bin/bash

# Add a small delay to ensure the USB device is fully initialized
sleep 3

for i in {1..4}; do
    if ! mountpoint -q /media/usb$i; then
        /usr/bin/pmount --umask 000 --noatime -w --sync $1 usb$i
        sleep 2
        exit 0
    fi
done

echo "No mountpoints available!"
exit 1
Save and close the file, then make it executable:
sudo chmod +x usbmountNow create a systemd service to trigger the script whenever a USB drive is plugged in:
# usbstick-handler@.service:
sudo nano /etc/systemd/system/usbstick-handler@.service
Paste the following:
[Unit]
Description=Automount USB drives
BindsTo=dev-%i.device
After=dev-%i.device systemd-udev-trigger.service systemd-udev-settle.service

[Service]
Type=oneshot
ExecStart=/home/admin/script/automount/usbmount /dev/%I
ExecStop=sync && /usr/bin/pmount /dev/%I

[Install]
WantedBy=multi-user.target
Save and close the file.
Reboot your Raspberry Pi, and insert a USB stick:
Reboot:
sudo reboot now
After the reboot, SSH into your Pi and check if the USB was mounted:
List content of /media/usb1:
ls /media/usb1
f you see the contents of your USB drive, it was mounted successfully.
Optional: Support for EXFAT
FAT32 has a file size limit of 4GB. If you want to play video files larger than that, format your USB drive using EXFAT. To enable EXFAT support on Raspberry Pi OS, install:
# EXFAT:sudo apt install -y exfat-fuse
AUTOPLAY
videolooper
Set Up Your Videolooper
Now that your system is prepared, it’s time to set up the actual Videolooper. We'll use VLC as the video player because it supports hardware acceleration, works without a graphical desktop environment, and can be fully controlled via the command line.
First, log into your admin account and install VLC:
# Install VLC:
sudo apt install -y vlc
To ensure that the videolooper starts automatically after each reboot, create a system service:
# Videolooper Service:
sudo nano /lib/systemd/system/autoplay.service
Insert the following content:
[Unit]
Description=Autoplay
After=multi-user.target

[Service]
WorkingDirectory=/home/looper
User=looper
Group=looper
Environment="DISPLAY=:0"
Environment="XDG_RUNTIME_DIR=/run/user/1000"
ExecStart=/bin/sh /home/looper/Script/autoplay.sh

[Install]
WantedBy=multi-user.target
Save and close the file.
Enable the service so it starts automatically on boot:
# Enable autoplay.service:
sudo systemctl enable autoplay.service
From this point on, make sure you're logged in as your standard user, in this example, looper. If you've chosen a different username, be sure to update the script and paths accordingly.
Create the necessary folders for videos and scripts:
# Create Folder Structure:
[ -d ~/Videos ] || mkdir ~/Videos && [ -d ~/Videos/autoplay ] || mkdir ~/Videos/autoplay
And:
[ -d ~/Script ] || mkdir ~/Script && cd ~/Script
Now we’ll create the core of the project: the autoplay.sh script. This is where you define VLC behavior, supported file types, playback options, and more. For example, we’ve configured it to play only mp4, mov, and mkv files by default, but if you want to include other formats like avi, simply edit the script and add them to the list of file types. You can also tweak the script to rotate the video output, mute the audio, or even turn it into a slideshow that plays images. The script is fully customizable, so you can adapt it to suit your specific project needs. A full list of available VLC command-line options can be found here: VLC command line
# Create Autoplay Script:
nano autoplay.sh
Paste the following content:
#!/bin/sh

# VLC OPTIONS:
# View all possible options: vlc -H

export XDG_RUNTIME_DIR=/run/user/1000

export AUTOPLAY=/home/looper/Videos/autoplay
export USB=/media/
export PLAYLIST=/home/looper/Videos/playlist.m3u

# Video Filetypes (you can add more filetypes):

FILETYPES="-name *.mp4 -o -name *.mov -o -name *.mkv"

# Playlist Options:
Playlist_Options="-L --started-from-file --one-instance --playlist-enqueue"

# Output Modules (edit to add options):
Video_Output=""

# Audio Options:
Audio_Output="--stereo-mode 1"

# Interface Options:
Interface_Options="-f --loop --no-video-title-show"


# Create Playlist File
# COMMENT: change sleep to 3 if you only want to play from the internal disk to start playback earlier, 25 is only necessary in order to find the USB drive after the Pi boots up, because otherwise the script may start before the USB drive is mounted and no files will be added from USB!

sleep 25
# Create Playlist File
echo "#EXTM3U" > "$PLAYLIST"
find "$AUTOPLAY" ! -iname ".*" -type f \( $FILETYPES \) 2>/dev/null >> "$PLAYLIST"
find "$USB" ! -iname ".*" -type f \( $FILETYPES \) 2>/dev/null >> "$PLAYLIST"

# Play Playlist if Files Exist
if [ -s "$PLAYLIST" ]; then
    /usr/bin/vlc -I dummy -q $Audio_Output $Interface_Options $Playlist_Options "$PLAYLIST"
else
    echo "No files found to play."
fi
Save and close the file.
Make the script executable:
chmod +x autoplay.sh

Test Your Videolooper
You’re now ready to test your videolooper setup!
You can transfer files from your computer to the autoplay folder using SCP. Adjust the following command to match your filename, IP address, and port:
# Filetransfer via SCP:
scp -P 6666 ~/Desktop/video.mp4 looper@192.168.1.123:/home/looper/Videos/autoplay
Once you’ve transfered your files, either to a USB stick or directly to the autoplay folder, shut down your Raspberry Pi safely:
sudo shutdown nowUp until now, everything was done as a headless setup, meaning without a screen or keyboard. Now it’s time to see it in action: Attach a screen to your Raspberry Pi’s HDMI port and plug the USB stick with your video files into your Raspberry Pi. (If you prefer, you can also just play from the internal autoplay folder you created earlier.)
Then connect the power to boot the device. After a short while, your Raspberry Pi should automatically start looping the video you transferred, either from the internal autoplay folder or from the USB drive.
Here you can download our two test files:
\(^0^)ノ
Congratulations! You now have a working SIMPLE VIDEOLOOPER!
We wish you a HAPPY NEW YEAR!
RECOMMENDATIONS
protection & cooling...
Keep Your Raspberry Pi Cool
To ensure smooth and reliable video playback, we recommend investing in a protective case for your Raspberry Pi, and ideally, one with active cooling.
Depending on your Raspberry Pi model and how demanding your video files are, playback can put significant load on the CPU and GPU. If the device overheats, it will begin to throttle performance, which can cause stuttering, glitches, or even system crashes.
To avoid this, we strongly suggest installing a cooling fan. Many options are available that mount directly onto the Raspberry Pi’s GPIO pins. Adding a fan not only helps prevent overheating but also extends the lifespan of your Raspberry Pi, especially in continuous-use setups like this videolooper.
Our main repository on Codeberg:

Github Mirror:
